InterServer stands out for its no-surprise pricing – what you pay today is what you’ll pay forever, with no renewal hikes. This makes InterServer an attractive option for budget-conscious users.
But price isn’t everything, so I wanted to see if InterServer delivers on speed, reliability, and ease of use. I was impressed with their usability and control panels. During my tests, I found that InterServer’s VPS hosting offers full control, with instant activation, multiple OS choices, and scalable resources.
However, with limited data centers outside of the U.S., and customer support not always reaching expectations, are the cheaper prices worth InterServer’s limitations?
In this InterServer review, I’ll break down pricing, features, performance, ease of use, and customer support, so you’ll know exactly what to expect before signing up.
InterServer Prices & Plans – 2025
With flexible payment options and a straightforward refund policy, InterServer makes it easy to get started. They offer various hosting plan options, including web hosting, VPS & cloud hosting, shared hosting, and dedicated servers.
InterServer doesn’t offer a free trial for new customers, but they provide a 30-day money-back guarantee. However, it’s important to note that this only applies to web hosting plans – if you use VPS or a dedicated server, you can’t get a refund.
Payments are simple, and InterServer accepts a range of options, including credit cards, wire transfers, checks and money orders, as well as digital currencies (bitcoin) and PayPal.
InterServer Shared Hosting Plans
InterServer VPS Plans
InterServer Dedicated Server Plans
InterServer Features
| SSD Storage | All plans use SSD storage for improved performance, speed, and reliability. |
| Operating System Choices | For VPS hosting plans, users can choose between Linux and Windows. |
| DDoS and Security | Integrating Path.net-powered DDoS protection to ensure security against attacks. |
| Scalable VPS Hosting | Allowing users to scale resources as needed with instant activation. |
| Operating System Choices | For VPS hosting plans, users can choose between Linux and Windows. |
| Intuitive Control Panels | cPanel and DirectAdmin support, allowing users to manage their websites efficiently. |
| CloudFlare Integration | Supports ASP.NET, PHP, Python, and Perl, making it flexible for differing development needs. |
| Global Content Delivery | CloudFlare CDN integration helps improve website speed and security across the globe. |

Ease of Use
I’ve tested the sign up process, set up a VPS, and played around with the InterServer dashboard and controls.
Here’s a breakdown of the experience and what you can expect.
Registration and Creating a New Account
Overall, I found the signup process for InterServer is quick and hassle-free. Once you’ve chosen the relevant hosting type, head to your plan options.

Since I’ve decided to test the VPS hosting, I was then asked to choose between the options: Linux VPS, Storage VPS, and Windows VPS. I went with Linux for its common usage.

I was then asked to either login or create a new account. InterServer also allows social sign-in (Google, Facebook, GitHub, or X) to save time.

Once I signed up, InterServer sent a verification code to my email. I entered the code, and my account was instantly verified.

At this point, I was redirected straight back to the InterServer dashboard – you’ll make your purchase at a later point, when configuring your server.
Ordering a VPS from the Dashboard
Once inside the InterServer dashboard, I was immediately taken to the Order VPS page. This page allowed me to customize my VPS before purchasing it.
You’ll be asked to configure server specifics like storage and memory capacity, transfer limits, data center location, and root password.

I was then taken to the order summary page to review and confirm the server details, and agree to InterServer terms. After checking the box, click place my order.

After placing my order, I was taken to the Cart page. At this stage, I had to add a billing address and choose a payment method. I selected my preferred payment method and completed the payment.

Once my payment was processed, I received a confirmation email containing login credentials, instructions for accessing the server, and a support link for assistance.
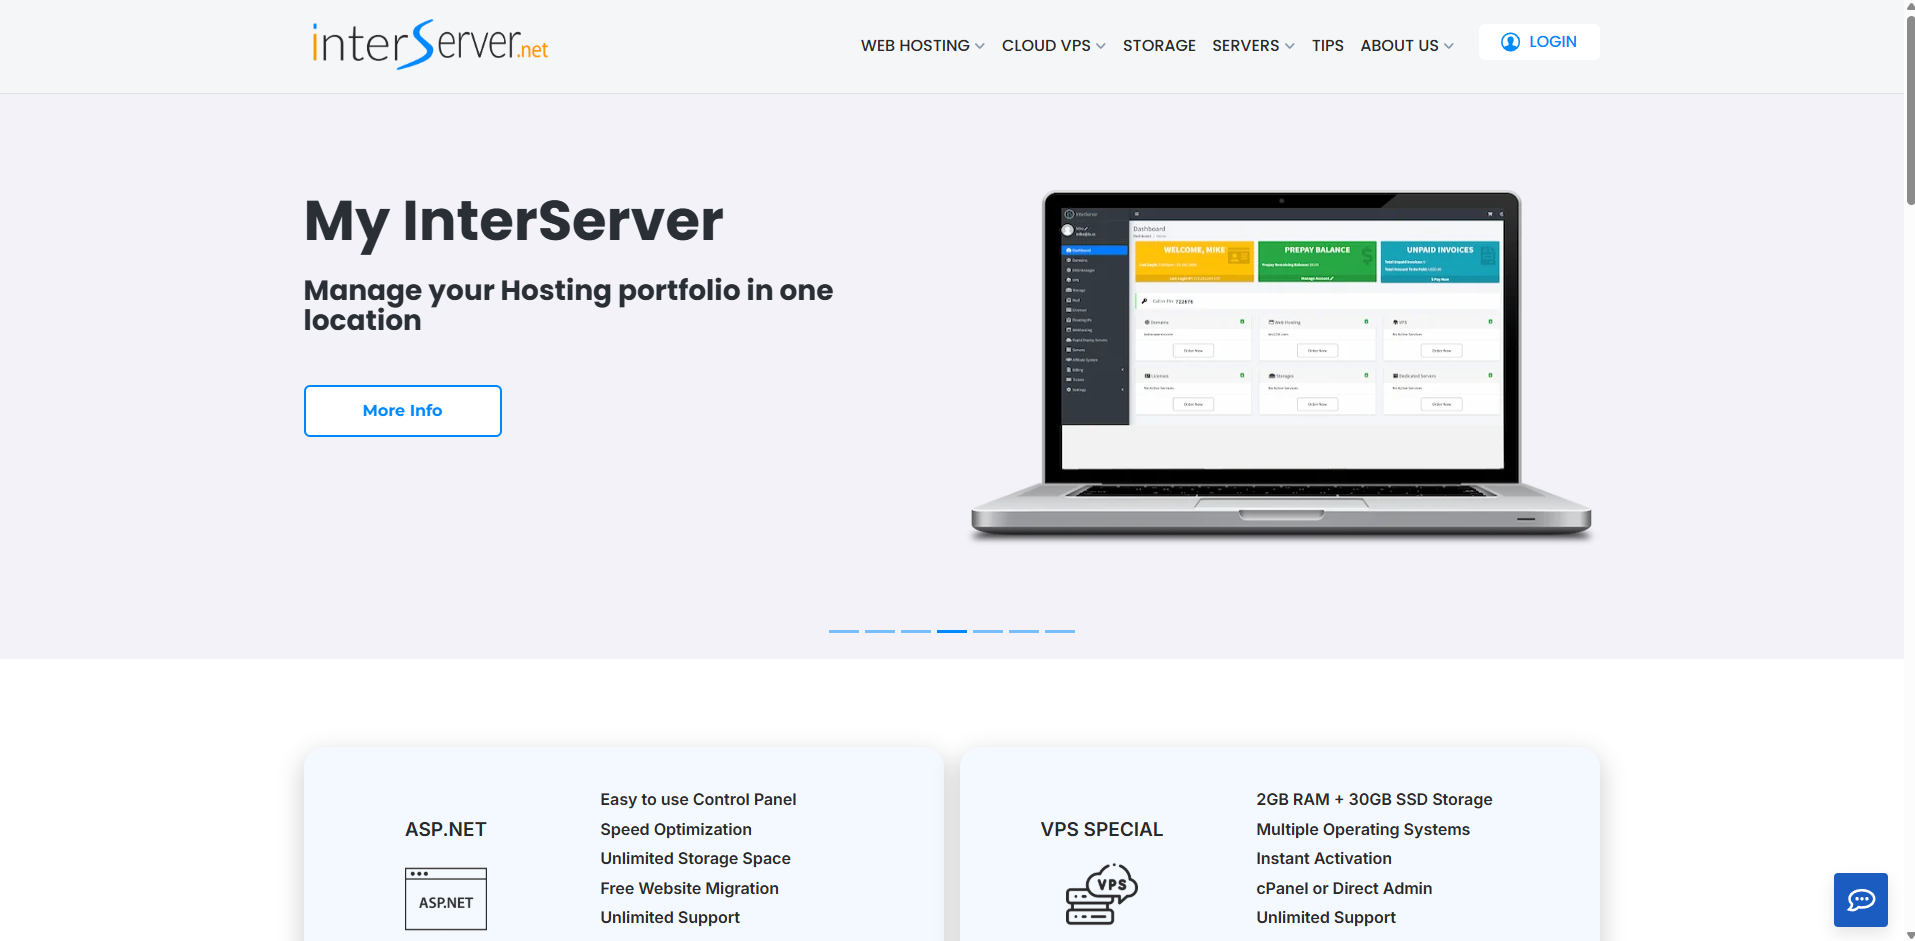
Exploring the Dashboard
From first glance, I was impressed with the InterServer dashboard. Unlike many hosting providers that make you dig through menus to find essential features, InterServer keeps everything in one place – including an organized account overview.

The left-hand menu contains the dashboard, VPS management, web hosting management, storage optimization, and billing information.
I really appreciate that everything was structured logically, so I didn’t have to search for essential settings.
Managing the VPS from the Control Panel
Since I’ve set up a VPS, I wanted to see how easy it was to manage and optimize it using the InterServer control panel. So, from the dashboard, I clicked VPS.

Here, I was greeted with all of my account’s active virtual servers.

The settings button to the right opens a well-structured and intuitive management interface, providing a detailed overview of my server.
Additionally, I could see my IP address, host server details, and other technical parameters such as the Vzid identifier.

Back in the control panel, I found the list of available management actions to be extremely useful. You can install operating systems, backup and restore your server, and manage storage devices, bandwidth, and traffic usage.
InterServer also offers optional control panel add-ons for users who prefer a more graphical server management interface. cPanel costs an additional $25 per month, while DirectAdmin is free.

Other options included Plesk Admin, Plesk Pro, and Plesk Host, though they were not supported for my VPS configuration. Since DirectAdmin was free, it provided an affordable alternative for those who did not want to manage their VPS entirely through the command line.
Managing Shared Web Hosting from the Control Panel
After exploring the VPS management panel, I wanted to check out how InterServer handled shared web hosting management.
On the left-hand menu, I clicked on Web Hosting, and found that the section functioned similarly to the VPS list, displaying all my web hosting accounts in one place.

To manage my hosting plan, I clicked on the settings icon next to my customhost.io package.

One of the most important sections in this panel was the Web Hosting DirectAdmin Login area, allowing me to log into my hosting control panel automatically, eliminating the need to enter separate credentials.

The InsterServer web hosting control panel provided additional management options, including downloading backups, migrating a website, and purchasing a matching domain.
Exploring InterServer’s DirectAdmin Control Panel
One thing I noticed while navigating the InterServer dashboard homepage was that there was a quick-access button to launch the control panel for web hosting.

I clicked on it and was taken directly to InterServer’s customized DirectAdmin interface, which was quite different from the cPanel dashboards I was used to.

The left-hand navigation menu contains all the tools I’d need to manage my website, all from a clean and organized interface.

From here, you can configure domain settings, manage databases and emails, and optimize security and website performance.
One feature that stood out was the WordPress Manager, which allowed me to manage my WordPress installations directly from the control panel. Unlike traditional cPanel, InterServer’s DirectAdmin included a dedicated section for managing themes, plugins, and updates.

Navigating the control panel was straightforward, and the widget mode provides a dashboard-style overview of resource usage which was useful for getting a quick snapshot.
Final Thoughts on InterServer’s Control Panels
I’ve found InterServer’s overall usability to be straightforward, intuitive, and feature-packed.
Registration was fast and simple, pricing was transparent and clear, and purchasing the VPS itself took only a few minutes. The dashboard was easy to navigate, and the control panel was bursting with beginner-friendly and expert optimized features.
InterServer’s DirectAdmin interface was just as capable, if not better in some ways, than the traditional cPanel – offering flexible developer tools not always available with other options.
Performance
The controls are great, but I wanted to see how InterServer performed under real-world conditions. I tested the speed, server response times, and network latency of InterServer’s shared web hosting servers. How did it perform?
InterServer Shared Web Hosting Performance
To simulate a realistic website, I installed WordPress on my shared hosting account and added some content, images, and plugins.
InterServer GTMetrix Performance Test Results
The GTMetrix results showed InterServer’s shared hosting performed decently, but had some limitations. Total Blocking Time (TBT) and Cumulative Layout Shift (CLS) were both low, meaning the website is stable and there was minimal JavaScript delay.
But a slower page load speed, and Time to First Byte don’t compare to many competitors; and indicate that the site could be optimized. A content delivery network (CDN) could help here, but InterServer does not include a built-in CDN, which means users would need to integrate a third-party service like Cloudflare.